
How to Make Designs for Shirt Printing
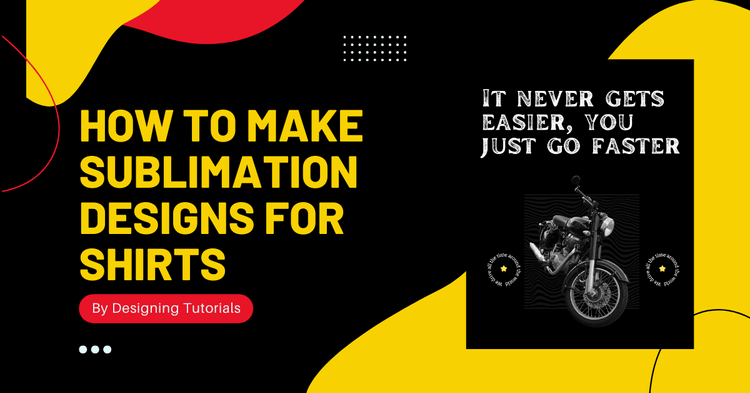
Sublimation printing is the best way to get a professional, high-quality design for your clothing. But suppose you want to learn how to make designs on t-shirts and other fabrics, where do lofty dream-designs go to be printed? This article will teach you the basics of making sublimation designs. In this article, you'll get the chance to make a simple design for sublimation printing using convenient and professional design tools.
Among the many, many effective ways to design for t-shirt printing there are a few programs you might have already heard about. Adobe offers one of the most professional selections of programs including Photoshop and Illustrator. The especially clever may be able to get away with Paint.NET or similar free editors. For the purpose of this article, you’ll be walked through the easiest method to design professional creative for t-shirt sublimation printing using Canva.
The easiest and most reliable method to make a sublimation design for non-techy is using canva.com. If you’re not already familiar with the benefits of Canva, get started by following the guide below. For the scrupulous investor or ambitious designer, there is a more detailed guide for Photoshop further down.
~
step-by-step design for a Sublimated t-shirt Print on Canva
Step I:
Sign In to canva.com or sign-up if you are using canvas for the first time.

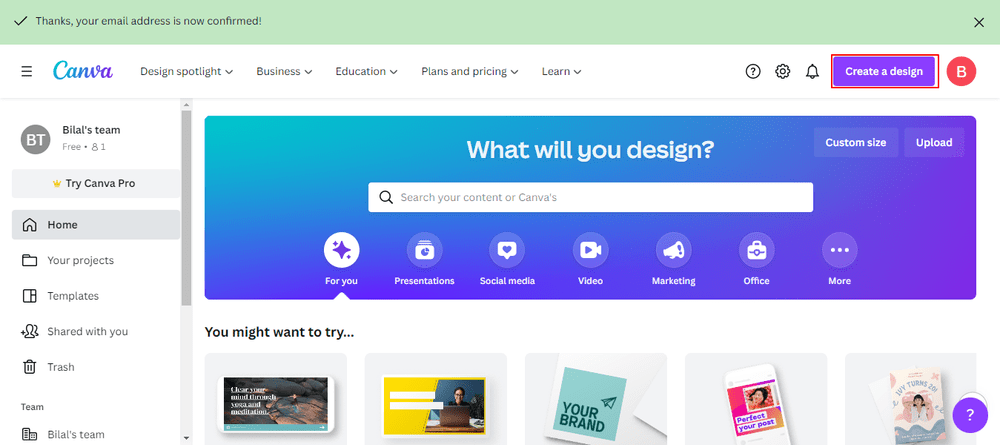
Step II:
After signing in to canva.com, click create a design.
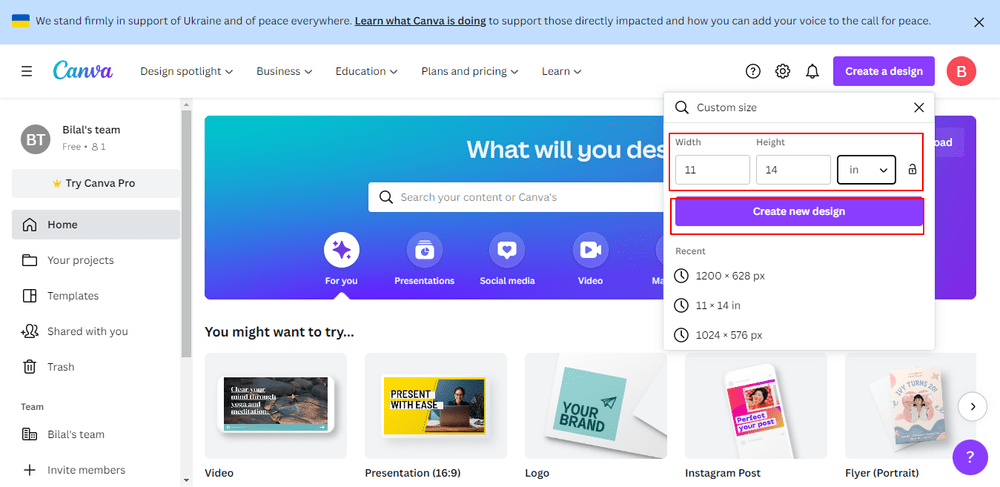
Select a custom size, put the canvas dimension at 11 inches width and 14 inches height, and click on create a new design.
You’ll get another screen with a canvas in the size of your picking to start your design.
Note: If you are designing a sublimation t-shirt for kids, you will have to put canvas custom dimension 5.5inches in width and 9 inches in height.
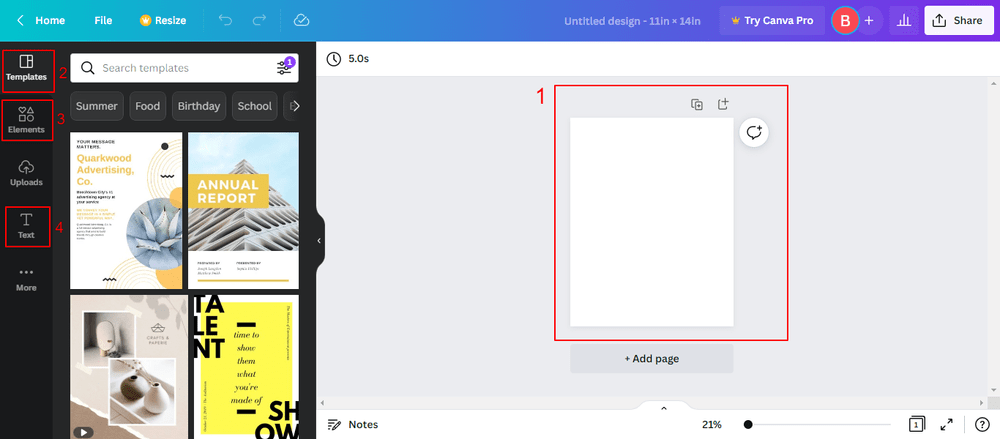
Step III:
Take some time to familiarize yourself with the Canva interface.
The canvas, your workspace.
The Canva Template library, complete with ready-to-use presets.
The Canva Elements library, you can find ready-made elements here to use immediately on your design.
Allows you to add text and format it with ease, even for the least tech-y graphic designer.
Step IV:
Suppose you’re an avid bike rider. Click the template tab and go to the search bar above the library.
Type in “biker” to get a selection of ready-to-use graphics related to your search term.

Step V:
Select one of the templates from the below search, like it’s been done here. We'll modify them later according to our needs.
(You can modify template graphics and typography by clicking the elements on your current canvas.)
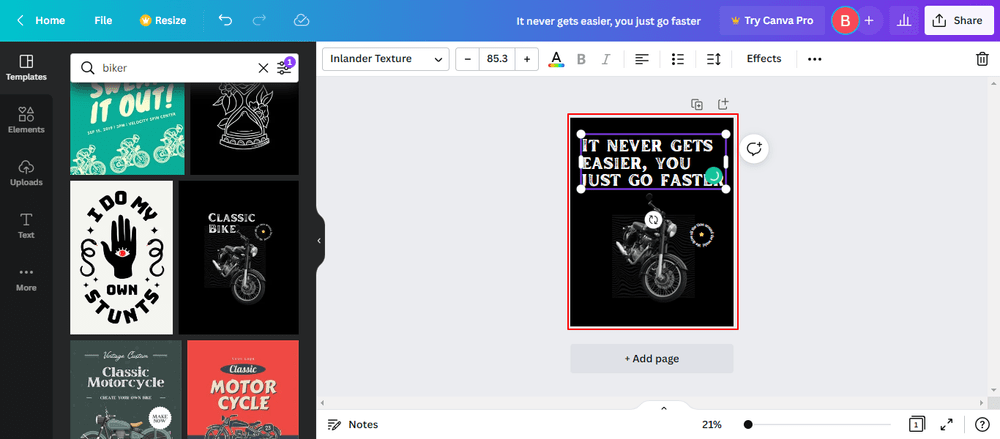
You can include more design elements from the "Elements Tab" or Text from the "Text Tab."

Step VI:
If you've done as I have done in this step-by-step, you are ready to go. Now it is time to export your graphics art for t-shirt sublimation printing.
Click on the share button and then select the download button.
Note: Before downloading your graphics from canvas, choose the desired format like JPEG, PNG, or PDF.
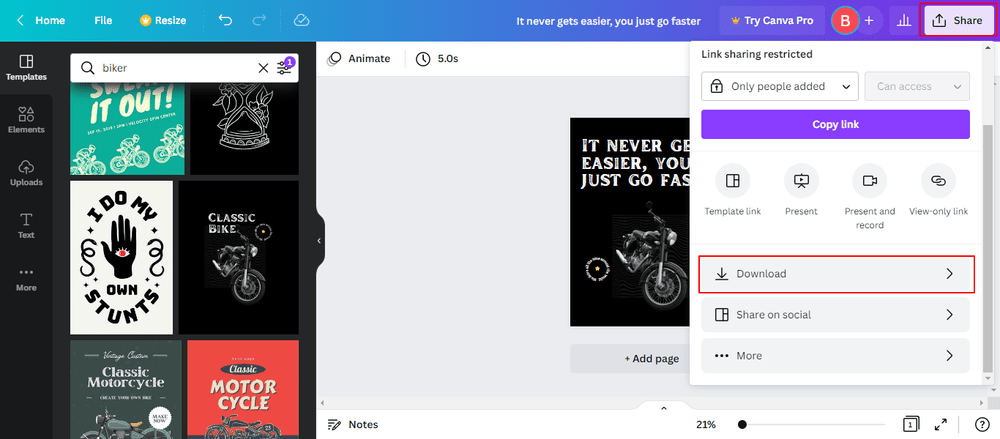
You’re done! It’s time to send the graphic to your manufacturer or use it to make your own graphic shirts by hand.
~
How to make a sublimation design for a t-shirt Using Photoshop
Here is a step-by-step video on designing your t-shirt for sublimation or other digital graphic purposes. Photoshop is a professional designing software by Adobe for the more tech-savvy user, you may want to view some tutorials if you are not already familiar with Photoshop’s user interface and facilities.